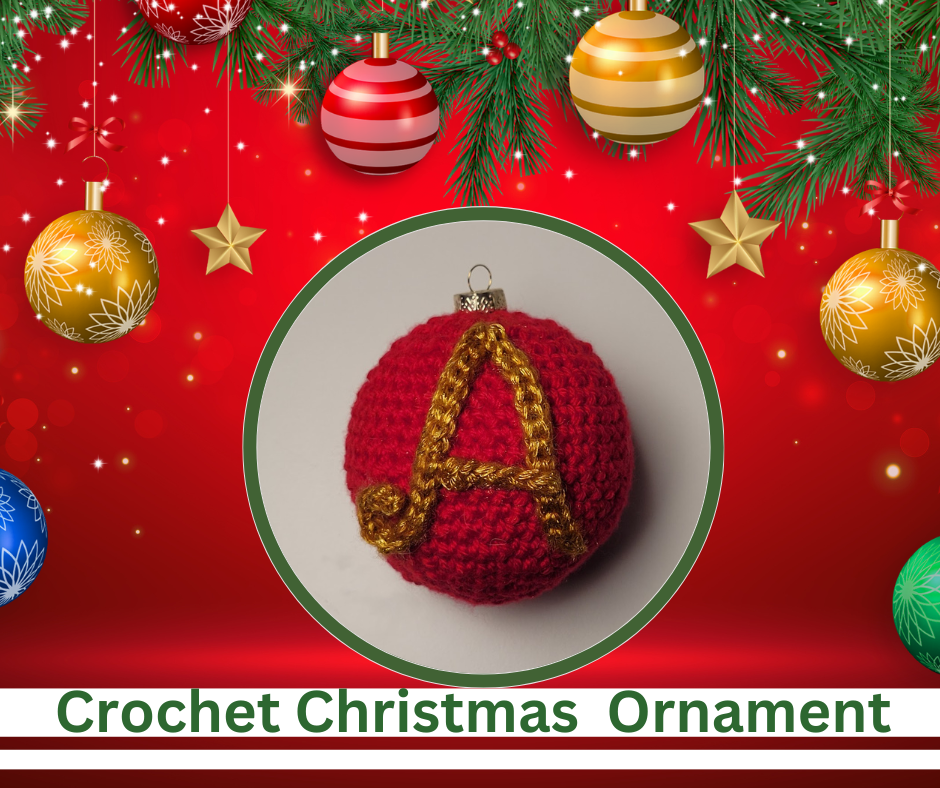
If you’re like me, you spend the entire year looking forward to decorating your Christmas tree. Even when I moved into a teeny tiny apartment at my first full-time job out of school, I still got a teeny tiny tree with some tiny ornaments. If you’re trying to think of a way to make a cute personalized gift for someone, consider making a simple crochet Christmas ornament with their first initial on it! I’ve got your back with this free crochet Christmas tree ornament pattern.
Difficulty: Beginner.
Yarn Used:
Worsted Weight (4) Yarn
I used a skein of red yarn I bought months ago and lost the label for, but any brand should work.
(Optional) Supplies:
I used a 3-inch foam ball instead of fiberfill for a firmer center.
Instead of sewing the lettering on, I preferred the look of glueing it on with Beacon Fabri-Tac. If you don’t want to glue, you could use a sewing needle or do surface crochet.
Finally, I used an ornament cap for the top.
Hook Size: 4mm
Stitches Used & Glossary:
Ch = Chain
SC = Single Crochet
INC = Increase Stitch
DEC = Invisible Decrease Stitch
MR = Magic Ring — the default or the alternative
2nd Chain from hook
Ch 1 & Turn
This is a video to walk you through:
The Ball
Be sure that you are working right side out and not inside out.
This is worked in continuous rounds (in a spiral) rather than in joined rounds.
- Crochet 6 single crochet stitches into a magic ring [6]
- INC X 6 [12]
- (SC, INC) X 6 [18]
Beginner Tip: If you don’t know what this instruction means, I’ve linked a video explaining. - SC, INC, (SC 2, INC) X 5, SC [24]
Beginner Tip: If you don’t know what this instruction means, I’ve explained it in the full video for the ornament. - (SC 3, INC) X 6 [30]
- SC 2, INC, (SC 4, INC) X 5, SC 2 [36]
- (SC 5, INC) X 6 [42]
- SC 42 [42]
- SC 42 [42]
- SC 42 [42]
- SC 42 [42]
- SC 42 [42]
- SC 42 [42]
- SC 42 [42]
- SC 42 [42]
- SC 42 [42]
- (SC 5, DEC) X 6 [36]
- SC 2, DEC, (SC 4, DEC) X 5, SC 2 [30]
- (SC 3, DEC) X 6 [24]
- SC, DEC, (SC 2, DEC) X 5, SC [18]
- (SC, DEC) X 6 [12]
- DEC X 6
Cut a 6-inch yarn tail. Thread through a sewing needle and insert the needle through the front loop of each stitch to close. Pull tight to close and insert your ornament hook.
Lettering
The lettering is going to be individual to your tension, so I recommend creating a chain and testing to see whether it’s the length you want. Then, once you’ve decided on the chain length, work a row of single crochet stitches. Pin to make sure the proportions are right and then either glue or sew it down.